Der 2004 Chevrolet Suburban ist eine Legende in Sachen Leistungsfähigkeit und Komfort, Ein Fahrzeug, das für den sicheren Umgang mit Familien gebaut wurde, Ladung, und lange Reisen. Aber wenn die Sonne untergeht, Es ist Achilles’ Die Ferse kommt zum Vorschein: die serienmäßigen Halogenscheinwerfer. Die Dunkelheit, Der gelbliche Schimmer, der in den frühen 2000er-Jahren nur ausreichend war, fühlt sich heute gefährlich veraltet an, Dies führt zu einer Belastung der Augen und verringerter Sicherheit bei modernen Geräten, schnelllebige Straßen. Upgrade auf 2004 Chevy Suburban LED-Scheinwerfer ist die effektivste Änderung, die Sie vornehmen können, um die Nutzbarkeit Ihres Suburban bei Nacht zu verbessern. Dieser Leitfaden führt Sie durch den gesamten Prozess, Von der Auswahl der richtigen Komponenten bis zur erfolgreichen Installation.
Warum auf Halogene verzichten??
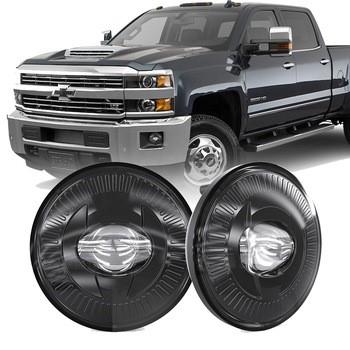
Der 2004 Suburban verwendet traditionelle Verbundscheinwerfer, Das bedeutet, dass es in diesem Fall ein separates Gehäuse und eine austauschbare Glühbirne hat, A 9006 für das Abblendlicht und a 9005 für das Fernlicht. Das Problem mit Halogenen ist ihre grundlegende Technologie: Sie erzeugen Licht, indem sie einen Glühfaden erhitzen, Das ist ein ineffizienter Prozess. Ein Großteil der Energie wird als Wärme verschwendet, und die Lichtausbeute ist naturgemäß begrenzt. Im Laufe der Zeit, Auch die Linsen können trüb werden, das ohnehin schon schwache Licht weiter streuen. LED-Technologie, welches Leuchtdioden verwendet, löst diese Probleme, indem es ein viel helleres erzeugt, Weißeres Licht sofort, weniger Energie verbrauchen, und hält deutlich länger.
Die Goldene Regel: Es geht nicht nur um die Glühbirnen
Das wichtigste Konzept, das Sie vor dem Kauf von LEDs verstehen sollten, ist, dass SieSie können LED-Lampen nicht einfach in Ihre serienmäßigen Halogengehäuse einbauen und gute Ergebnisse erwarten. Tatsächlich, Es falsch zu machen ist gefährlich und illegal.
Halogengehäuse sind so konzipiert, dass sie Licht aus einem winzigen Winkel reflektieren und bündeln, bestimmten Punkt – dem Halogenfaden. LED-Lampen verfügen über mehrere Dioden, die an verschiedenen Stellen angebracht sind. Wenn diese Dioden nicht so positioniert sind, dass sie den Halogenfaden perfekt nachahmen, Das Gehäuse streut das Licht unkontrolliert. Das Ergebnis? Ihr Armaturenbrett könnte hell aussehen, aber die Straße wird nicht richtig beleuchtet. Schlechter, Sie erzeugen eine starke Blendung für entgegenkommende Autofahrer, Dadurch werden sie geblendet und eine gefährliche Situation entsteht.
Die Lösung ist einer von zwei Wegen:
- LED-Lampen für Halogengehäuse: Die besten LED-Lampen auf dem Markt sind darauf ausgelegt, dieses Problem zu lösen. Sie bestehen aus Chips, die genau an der gleichen Position wie ein Halogenfaden platziert sind, und verfügen häufig über Funktionen wie Drehmanschetten zur Feinabstimmung des Strahlmusters. Wenn Sie sich für eine Qualitätsmarke entscheiden, die für ihren Fokus bekannt ist, Sie können ein hervorragendes Ergebnis ohne Blendung erzielen.
- Kompletter Austausch der Scheinwerferbaugruppe: Für das ultimative Upgrade, Sie können die gesamte Scheinwerfereinheit durch eine Aftermarket-Baugruppe mit integrierten LED-Projektoren ersetzen. Dies ist eine teurere Option, garantiert aber ein perfektes Ergebnis, blendfreies Strahlbild mit modernem, stilvoller Look.
Auswahl der richtigen LED-Lampen
Für einen direkten Lampenwechsel, Du brauchst ein Paar 9006 (Niedriger Strahl) Und 9005 (Hochstrahl) LED-Kits. Beim Einkaufen, Achten Sie auf diese Hauptmerkmale einer hochwertigen LED-Glühbirne:
- Seriöse Marke: Vermeiden Sie Zufall, No-Name-Marken auf Amazon. Bleiben Sie bei Unternehmen, die für ihre Forschung und Entwicklung bekannt sind, wie zum Beispiel Diodendynamik, GTR-Beleuchtung, Meereslicht, oder Hikari.
- Richtige Chipplatzierung: Suchen Sie nach Glühbirnen, die a verwenden “lüfterlos” Design oder lassen Sie Chips an der positionieren 3 Und 9 Uhrpositionen, um den Halogenfaden perfekt nachzuahmen. Dies ist der wichtigste Faktor für ein korrektes Strahlmuster.
- CAN-Bus-Kompatibilität: Der Computer Ihres Suburban könnte den geringen Stromverbrauch von LEDs als Folgendes interpretieren: “Durchgebrannte Glühbirne” und eine Warnmeldung auf dem Armaturenbrett auslösen. Die meisten hochwertigen LED-Kits enthalten CAN-Bus-Decoder oder sind von Natur aus CAN-Bus-fähig, um dies zu verhindern.
- Effektive Kühlung: LEDs erzeugen an ihrer Basis Wärme. Hochwertige Glühbirnen verwenden robuste Aluminium-Kühlkörper oder sind leise, Zuverlässige Kühlventilatoren verwalten diese Wärme und sorgen für eine lange Lebensdauer.
Schritt-für-Schritt-Installationsanleitung
Dies ist ein sehr leicht zugängliches DIY-Projekt, für das nur grundlegende Werkzeuge erforderlich sind.
Was Sie brauchen:
- Ihre neuen LED-Lampen-Sets (9006 für Abblendlicht, 9005 für Fernlicht)
- A #15 Torx-Schraubendreher (für die Kühlerverkleidung)
- Ein Kreuzschlitzschraubendreher
- Kabelbinder und Isolierband
Verfahren:
- Trennen Sie die Batterie: Zur Sicherheit, Beginnen Sie immer damit, den Minuspol der Batterie abzuklemmen.
- Erhalten Sie Zugang: Öffnen Sie die Haube. Sie müssen die schwarze Kunststoff-Kühlerverkleidung entfernen, die von mehreren festgehalten wird #15 Torx-Schrauben. Sobald diese entfernt sind, Sie haben einen viel besseren Zugang zur Rückseite der Scheinwerferbaugruppen.
- Entfernen Sie die alten Halogenlampen:
- Suchen Sie die Rückseite der Scheinwerferbaugruppe. Sie werden eine große Staubschutzkappe aus Gummi sehen.
- Drehen Sie diese Staubkappe gegen den Uhrzeigersinn und ziehen Sie sie ab.
- Sie haben jetzt Zugriff auf die Glühbirne. Lösen Sie die Drahtklammer, mit der die Glühbirne befestigt ist, indem Sie auf das Ende drücken und sie zur Seite schwenken.
- Ziehen Sie die Halogenlampe vorsichtig gerade heraus. Trennen Sie den Kunststoffkabelbaum, indem Sie auf die Lasche drücken und ihn auseinanderziehen.
- Installieren Sie die neuen LED-Lampen:
- Wichtig: Vor dem Einsetzen der LED-Lampe, Schließen Sie es an den Kabelbaum des Fahrzeugs an, um sicherzustellen, dass es aufleuchtet. Dies bestätigt, dass die Polarität korrekt ist. Wenn es nicht leuchtet, Ziehen Sie den Kabelbaum ab, Drehen Sie den Stecker der LED 180 Grad, und schließen Sie es wieder an.
- Führen Sie die Kabel und den Treiber der LED-Lampe vorsichtig durch die Staubkappe.
- Setzen Sie die LED-Glühbirne in das Gehäuse ein, Stellen Sie sicher, dass die Laschen richtig ausgerichtet sind. Die drei Registerkarten auf a 9006/9005 Die Glühbirne ist kodiert und kann daher nur in eine Richtung eingesetzt werden.
- Befestigen Sie die Drahtklemme wieder, um die LED-Lampe fest an Ort und Stelle zu halten.
- Verwalten Sie die Komponenten: Der LED-Treiber (die kleine Box, die an den Drähten befestigt ist) muss gesichert werden. Befestigen Sie es mit Kabelbindern an einer stabilen Halterung oder einem Kabelbaum in der Nähe des Scheinwerfers. Stellen Sie es nicht auf scharfkantige Metallteile oder bewegliche Teile. Verstauen Sie alle überschüssigen Kabel sorgfältig und setzen Sie die Gummi-Staubschutzkappe wieder auf die Rückseite des Gehäuses, wie in der Beschreibung beschrieben Industrie Mag. Möglicherweise müssen Sie die Staubkappe einkerben, damit die Drähte hindurchpassen; Einige Kits bieten neue, vorgekerbte Kappen.
- Wiederholen und wieder zusammenbauen: Wiederholen Sie den gesamten Vorgang für die restlichen drei Glühbirnen. Sobald alle Lampen installiert und die Komponenten befestigt sind, Bringen Sie die Kühlerverkleidung wieder an und schließen Sie die Batterie wieder an.
Der letzte und entscheidende Schritt: Richten Sie Ihre Scheinwerfer aus
Nach der Installation, Sie müssen Ihre Scheinwerfer ausrichten. Dies ist nicht optional. Auch mit perfekten Glühbirnen, Falsch ausgerichtete Lichter sind gefährlich.
Parken Sie Ihren Suburban auf ebenem Boden mit Blick auf eine Wand oder ein Garagentor 25 Meter entfernt. Schalten Sie Ihr Abblendlicht ein. Der Hotspot des Strahls sollte etwas unterhalb der horizontalen Mittellinie des Scheinwerfers und rechts von der vertikalen Mittellinie liegen. Die meisten Wände haben eine deutliche Trennlinie; Stellen Sie es so ein, dass es eben ist. Verwenden Sie die Einstellschrauben oben und an der Seite des Scheinwerfergehäuses, um diese Feineinstellungen vorzunehmen.
Sobald es fertig ist, Machen Sie mit Ihrem Suburban eine Nachtfahrt. Der Unterschied wird geradezu revolutionär sein. Die Straße wird in klares Wasser getaucht, hell, weißes Licht, Reduziert die Ermüdung der Augen drastisch und erhöht Ihre Reaktionszeit. Indem Sie dieser Anleitung folgen, Sie haben nicht nur Ihre modernisiert 2004 Suburban haben jedoch eine erhebliche Investition in Ihre Sicherheit und die aller Verkehrsteilnehmer getätigt.